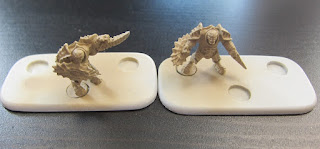
After cleaning and priming the first stage of painting is to airbrush Sand Yellow over the entire model.
After that, I airbrushed bone white to the top of the figure. I did this by holding the model at a 45 degree angle and just hitting the edges of the shoulders, kneecaps, and side of the figure. The result was impossible to see in photography with the lighting I have but the edges are a brighter colour and will hold onto the details better.
See here:
After this I freehand painted the heads and hands with Pale Flesh.
The next stage was to wash the entire figure, except for the bone blade and the "fleshy" interior of the inner shield with a 1:1 Umber Shade/water mix. This picks out the details and gives a warm base to mini.
I gave the figure about 10 minutes for most of the shade to dry but I didn't want it entirely dry. Instead, I wanted the deepest part of the shade to sink into the sand and bone and then I wanted to mix and layer in the Druchii Violet. It's important now to decide the overall tone you want in the figure. I focused on keeping the purple sections just to the inner chest and the deepest recesses of the shoulders. If you bleed to much on just go over the second with more umber. The nice thing about washes are that they are incredibly thin and want obscure details.
After that dried in I layered in Carroburg Crimson to the bone blade and interior of the shield. See below:
The next stage is to slowly highlight up the shoulders and edges of the armour. Each corner is edge highlighted to make them stand out. Edge highlighting is easiest to achieve when you literally drag your brush lightly across the figure using the edge, not the tip, of the brush.
Picking out the details you might find yourself in need of cleanup. Keep in mind it's easy to layer in a bit more browns and purples. At this stage I had to do a little cleanup as I had layered in a bit too much purple.
The next stage was to apply a 1:10 Blue Shade/water mix to the face and hands. I kept the paint that thin to ensure that I wouldn't change the primary colour of the flesh too much. I chose blue shade to differentiate that part of the figure from the rest of the model's brown and purple tones. Once that was dry I applied Extra Opaque Heavy Blue followed by Magic Blue to create the eyes. To do this you'll need a steady hand a very fine tip of your brush and the least amount of paint possible.
The last stages were to base the figure. I use a standard sand with PVA glue. Once it's dried and in place I layer on a chestnut wash (Seraphim Sepia). Once that's dried I "wetbrush" (akin to drybrushing but with more paint on the brush but a lighter stroke) Scrofulous brown, then Plague Brown, then finally Dark Sand. Once that's in place I put small rocks down (bits of cork - Army Painters Battlefield Rocks) followed by Army Painters "Steppe Grass" static grass. I really love that combination of colours as it produces a barren sandy dirt surface that's perfect for blasted landscapes in a future war.
And that's it! You're done :D


No comments:
Post a Comment